Bird of Prey Floppy Origami
| Further Star Trek floppy diskette origami: Bird of
Prey How to turn a useless floppy diskette into a (vague) representation of a Klingon warship in 10 easy steps. Find a floppy and follow along. As you do, remember: I'm a sysadmin, not an artist, dammit! |
|
|
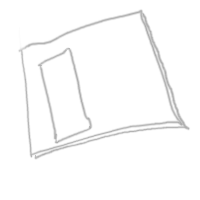
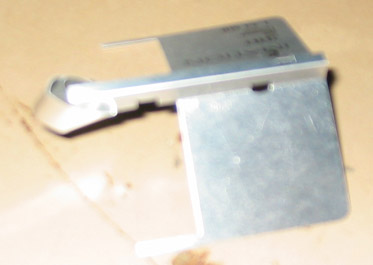
Step 1: Start with a floppy diskette. It must have metal parts; it can't be entirely plastic. The sliding cover is a metal piece at the bottom of the diskette that protects the spinning floppy media. Remove the sliding cover carefully. It's held in place on a plastic rail, and secured with a small spring. Generally they pop right off, given a bit of pressure. You don't want to deform the sliding cover, it's shape will be important. You can discard the rest of the floppy diskette, we won't be using it. Each cover has two "halves", consisting of a thin and thick side on either side of a rectangular hole. The cover also has a "spine", where the two halves meet. |
|
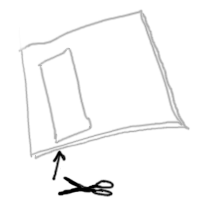
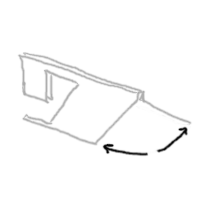
Step 2: Make a single cut with a sharp pair of scissors. You'll want to make the cut as close to the thin side of the cover. |
|
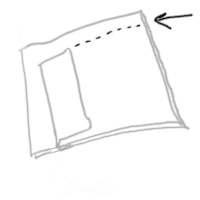
Step 3: Make a valley fold, about 45 degrees out. (A valley fold is one that transforms a flat surface into a V, like a valley. Examine Step 4 for a better picture.) I like to use a pair of needle nose pliars, to keep the fold perpendicular to the spine. |
|
Step 4: Repeat the valley fold on the other half, 45 degrees, as shown. You've just given your Bird of Prey wings, and disruptors. |
|
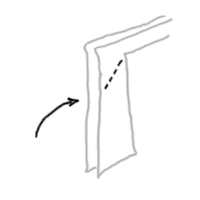
Step 5: Turn your attention to the "thin" side. You'll want another valley fold, but this time, make it about 90 degrees out. The fold line itself should be at an angle. |
|
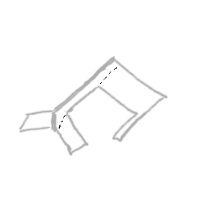
Step 6: Make the second valley fold on the other half of the cover. You should have something that looks nothing like a Bird of Prey. |
|
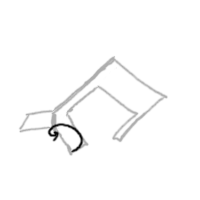
Step 7: Curve the end of one of the strips around, towards the center. It's metal, so you can coax it around into a circle of sorts. |
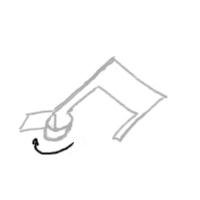
|
Step 8: Tuck the end of the curve you just folded around and back inbetween the two halves. |
|
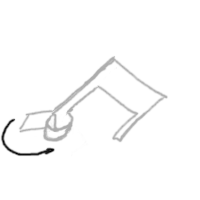
Step 9: Do the same thing in Step 7 to the other strip - curve the end around, towards the center. It's metal, so you can coax it around into a circle of sorts. |
|
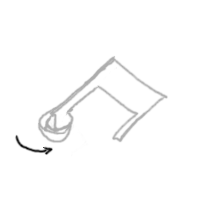
Step 10: You can't tuck this end into the center, so just bend it all the way around the first curve from Step 8. Being metal, it should just stay there. |
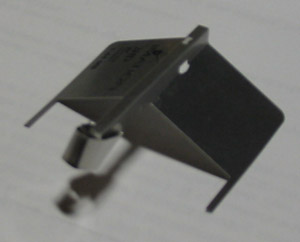
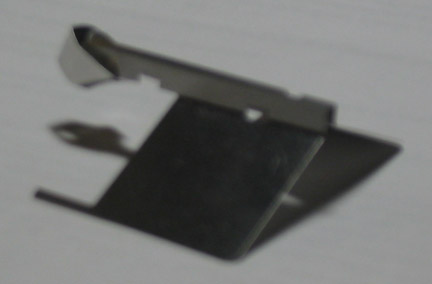
More example photos:
Apparently, I'm not a photographer, either. This should give you a rough idea of the result.
|
|
